
One of the things I love about WordPress websites is how easy it is to add features to a website without hiring a designer.
I’m working on a new website for my neighborhood association, and decided that a calendar was needed so everyone could easily see upcoming meetings and events. A quick search of the WordPress plugins resulted in my adding the Calendar plugin by Kieran O’Shea.
SEE ALSO: Which Social Sites Bring Traffic to Your Blog?
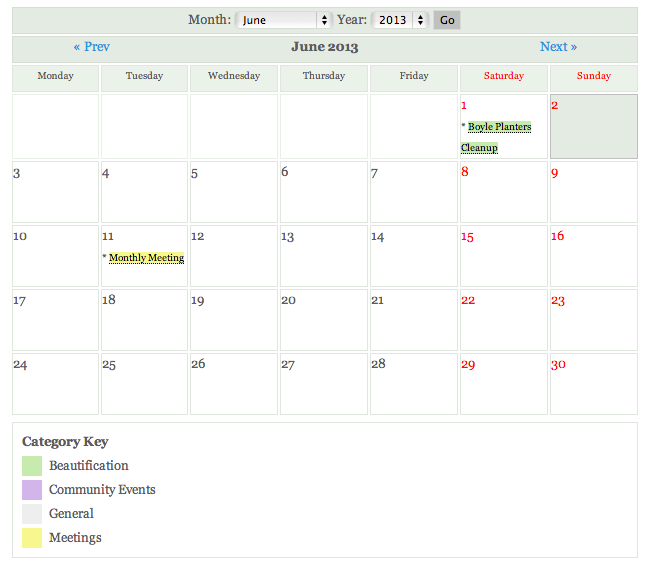
Click on the calendar to go to an interactive version
Key Features of WordPress Calendar Plugin:
I really like this calendar. It’s easy to install and easy to use for someone who doesn’t know HTML or code.
Once you install the plugin, all you have to do is to use the shortcode {CALENDAR} on a page or post to populate the calendar anywhere in your website. You can also use the provided widget to put a thumbnail of the calendar into your sidebar or footer.
The calendar management is done through the settings dashboard. There are just 3 simply screens for you to manage everything.
SEE ALSO: Converting Your WordPress Website to a Responsive Theme
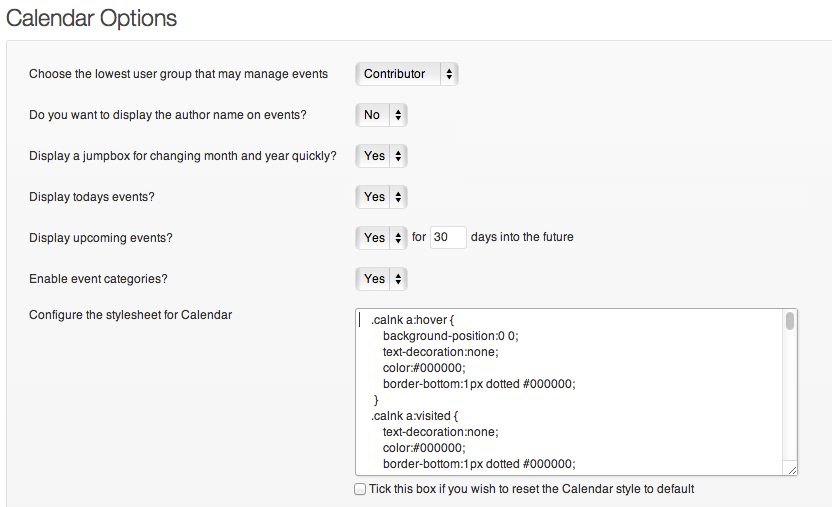
After installation, the first thing you should do is go to the Calendar plugin options page and adjust your settings.
You can set which users can manage calendar events and if you want to display who created the event. This page also lets you add links on the calendar to let users quickly jump to the next month or year, an option to display today’s events and upcoming events, an option to use categories, and a stylesheet where you can change the CSS formatting.
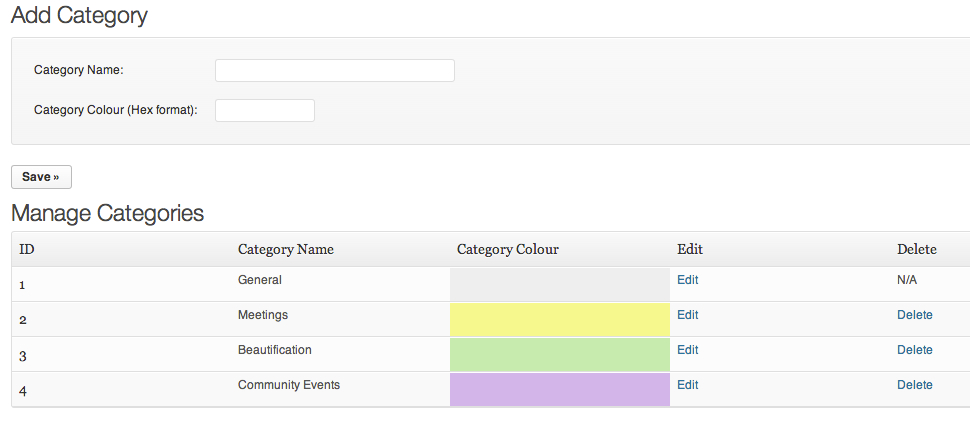 If you plan to use categories, then the next step would be to create your categories. You can assign a color to each category. You do need the Hex code for each color but it is easy to find Hex codes for colors with a quick internet search.
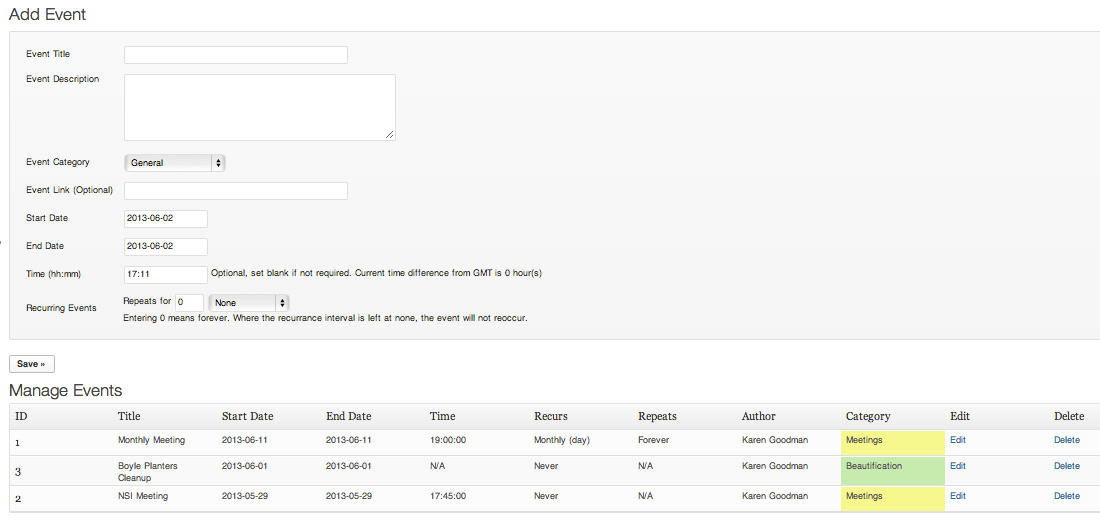
The final step is to add your events.
Keep in mind that the mouseover pop up view on the calendar is only so big, so keep your title short (it needs to fit on one line for everything to show up correctly). Assign a category and add the event’s start date, end date and time (using military format). You can even make the event recurring.
If you need to provide more information than will fit in the pop-over, you can include a link to another web page. My plan is to create a blog post for each event, and link to that page.
SEE ALSO: 11 Steps to Creating the Perfect Blog Post
Wish List:
Just in case this post catches the attention of the plugin creator, I have 4 suggestions that would make this plugin even better.
- End Time – most events are for a specified period and there should be a way to put in the end time of the event. I would make this optional so it could be left open ended if people are able to stay as long as they want. Currently, the only way to specify an end time is to repeat the time range in the description.
- Mouse-Over Preview Screen or Maximum Character Counts – in order to know if the event title is too long, you have to save the event, go to the page where you have posted the calendar and click on the event in the calendar. If it is too long, then you need to go back to the manage event page and edit. Then repeat until it shows up properly. The solution would be either to give you a way to preview the mouse-over before saving the event, or to limit the number of characters for the title and description.
- Time Format – most of us don’t work in military code. It would be nice to be able to input the time of an event using a 12 hour clock with AM/PM option.
- Shortcode Instructions – no where in the plugin does it tell you the shortcode to use to actually put the calendar on a page or post. I had to go to the author’s site and dig around to find it. That should be clearly explained on the Options page.
None of my wish list items deterred me from using the plugin.
Now that I see how easy it is to use, I’m planning on using it on this website for local entertainment options in St. Louis. Stay tuned for those posts coming soon.